Showing posts with label DIY. Show all posts

Thursday, November 28, 2013

Advent calendar DIY

It's high time for the Advent calendar and I've found a very nice one on raumdinge blog, Valentina has really great ideas. The instructions are in German but the pictures and the printable santas will help you :)

Picture: raumdinge blog

Picture: raumdinge blog

Picture: raumdinge blog

Kram,


Isabell


Saturday, October 26, 2013

Musselmalet Mega DIY result

After a long autumn walk through Munich's English Garden, a coffee in one of my favorite coffee shops here in Munich and some cheesecake ;) , I finally got the message that my cup and saucer with the Musselmalet Mega pattern is ready and went to get it. I'm really happy about the result:


Hope you like it too!

Kram,

Isabell

Thursday, October 24, 2013

Musselmalet Mega pattern- DIY

I don't know if you remember my post about the Musselmalet Mega pattern and that I wanted to create a birthday present for my friend. I went there today and it was really great fun. You can choose between different ceramic styles : cups, plates, Christmas ball ornaments... and also the colors of course.  You might think that the base coat looks a little bit bluish, and you're right, but they told me it will be white as soon as it gets fired.


I'll have to wait some days until I get the final result, so you and me have to be patient ;)

Have a great evening!

Isabell

Sunday, September 1, 2013

The candleholders

Do you remember my post about doing things you like ? I just wanted to show you how nice the candle holders look together with the one I already have. Some might think "but they have different shapes" but this is what I like about it and makes it special for me. I also look to combine things you wouldn't expect, you can find that everywhere in our apartment, I mix modern and old-fashioned becasue for me that's what makes the coziness. Modern can be too clean and cool and old-fashioned can be to kitschy and too much, mixing it brings the perfect balance.


Have a lovely start of the week!

Isabell

Saturday, July 13, 2013

Strawberry Jam

It's high time to make this year's strawberry jam, as the strawberry season will end soon. It's really very, very easy and tastes so much better than the one you can buy. (And you get a 100% natural, no preservatives, no pectin, no artificial flavors jam) 

All you need is:
  •  strawberries
  • preserving sugar
  • jam funnel 
  • clean jam jars

I used 2 kg of strawberries and 1 kg preserving sugar, the result is 8 jam jars filled with strawberry jam. Sterilize the cleaned jars by boiling them completely submerged in boiling water for 10 minutes (this will preserve the jam for a longer time). Keep the jars in the hot water until they are ready to be filled. Rinse the strawberries, gently pull off the leaves and cut into small pieces and weigh on a kitchen scale. After that put them into a large cooking pot (make sure that the pot is big enough to to allow for the foamy expansion that will occur) and add the preserving sugar, bring to cook while stirring. Skim off the foam with a spoon diligently and lower the heat to about medium, so that the jam is still bubbling but not boiling over. When the strawberries have turned soft, but still hold their shape, you have two choices as to how to proceed: One is, just leave the berries in there (I used this alternative, because I wanted some texture to the jam.) The other is to use a hand blender, to crush them if you want your jam to be smooth. Continue simmering until the syrup has thickened up and use the jam funnel to fill the jam jars. If you use jam jars with a rubber gasket and a side latch just close the lid immediately and it's fine, with a jam jar with a twisting lid make sure to close the lid immediately too, but to also turn them upside down for approx. 5 minutes.


I also found some really nice labels here for the various jams:


Time for a toast with my homemade jam... :)

Kram,

Isabell

Thursday, May 23, 2013

Natural hand care

When the weather is cold outside my hands often feel dry and I have a hand balm near my computer at work, ready to be used. But I remember a simple tip from my German grandmother: She always used olive oil and sugar and made a peeling out of it. So therefore I'm going to try that now:

Take 2 cups of brown sugar and add 2 table spoons of sea salt, olive oil and if you don't like the smell of olive oil some drops of an essential oil like lemon balm oil.

Photo: welt.de

Mix it all together and use it like a hand peeling, rinse it off. It's also a very nice present, if you want to give something self-made as a present. In addition to the natural hand care I also like these very much:

Photo: compagniedeprovence

Kram,

Isabell

Wednesday, March 27, 2013

DIY Easter Decoration

I just found some very nice last minute decoration for Easter, which you can easily prepare before your guests are coming, all you need are some branches and different papers with different colours:

Photo:livingathome


or the other decoration I like a lot is this one:

Photo:schoener-wohnen
Egg and Bunny ornaments made from Newspapers:

Photo: impressionen
As I won't have an Easter brunch this year, I hope you will have an Easter brunch together with your friends and families! Of course I'm looking forward to our vacation, but I would have liked to have my family around during Easter.

Kram,

Isabell

Wednesday, February 20, 2013

Easter Bunny - DIY

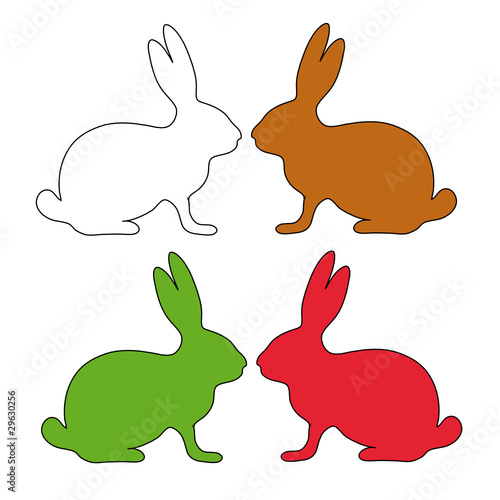
Today when I came home I had a good mind to do crafts and I need some decoration, as I'm planning to invite my family to an Easter brunch. So better start early... I found these nice Easter Bunnies on the internet :
Picture: fotolia


and used them as a model for my own template:


I use a thicker white drawing paper and copy the Easter bunnies, but you can of course also print them and use these as a template.

Then I choose a wrapping paper which I like and fold it


so that I can cut out 2 mirror inverted bunnies at once:


After that I use a glue to glue the 2 pieces together and put a toothpick in the center:


Now I can use them to decorate the food for the buffet, or of course you can also tie a bow under it and write the names of the guests on it. Or use different animals, egg-shaped patterns with one colour or multi-coloured... 

Hope you like it!

Isabell


Sunday, January 13, 2013

Musselmalet Mega - DIY

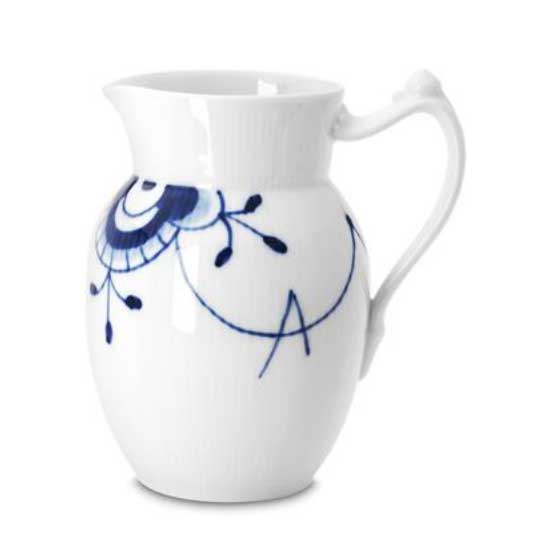
My best friend in Copenhagen has some items from this porcelain from Royal Copenhagen, which is called "Musselmalet Mega". She loves it, but it is very expensive :
royaldesign
I also think that it looks very nice and I like the design of the sauce boat :

royaldesign
As she will turn 30 this year I would like to give her a present that she likes, but that is also personal in a way. While going for a walk in the snowy Munich city center today, I've found a shop where you can decorate ceramics. They have different ceramic forms and you can decorate them with colours and a glaze. Then they burn it for you and you can pick it up one week later. I'll use the Musselmalet Mega pattern and I guess I'll have to exercise a little bit ;), but that would be something she definitely likes.

golocal

I'll show you my result as soon as it is ready!

Kram,

Isabell


Wednesday, January 2, 2013

Recycling

2 month ago I bought a very nice vintage wrapping paper in a shop in Munich, that is a little bit thicker. I saw it and I couldn't resist. :) I like these old patterns and I thought that I could use it for the Christmas gifts.

Photo: bindewerk
But I had a better idea:


I used old paper packings (this one was a mix for American pancakes :)), cleaned them and used the paper to make them look nicer. I use it for all my pens, but of course you can also use it for gifts or as a storage for candles, tee bags etc.

Kram,

Isabell

Sunday, December 30, 2012

My Snowflakes

My Snowflakes are ready! The result is ok, I think. For the next ones I 'll have to buy thinner paper, as it was quite difficult to fold this paper I had and to cut out the forms. I guess I will also have to iron these so that they will look as perfect as Martha Stewart's. :)


I'll use them for decorating the presents for our hosts on New Year's Eve and use some as a decoration for the window in the bedroom, as it is a room under the eaves and has a roof window. It will certainly look nice!

Kram,

Isabell


Snowflakes for New Year's Eve

For New Year's Eve I will cut out some snowflakes this year. For Christmas I prefer red, green and white as these are warm colours. But for New Year's Eve I also like white and silver, as it's a little bit more elegant. Martha Stewart has a good description on her webpage how to make these snowflakes:

Photo: marthastewart

Photo: marthastewart

Photo: marthastewart

I'll try that now. :)

Have a good day!

Kram,

Isabell

Monday, December 10, 2012

Hazelnut tree branches - Perfect for decorations

In November, my parents' neighbor has pruned the hazelnut tree back and asked me whether I would like to have the branches. Of course I said yes. Hazelnut branches are great as you can put ornaments on them and you can reuse them many years. You just need to dry them. Here is what I put into the branches:


Some Swedish Yule goats, hearts and tomtes


Kram,

Isabell

Thursday, November 29, 2012

Advent calendar - DIY

Do you remember my post about IKEA's Christmas and what I bought? Now I need it :). I've also bought white bread paper bags which I've decorated with stickers and the small things I've drawn. All you need are 24 paper bags, a cotton twine, a stapler and some pens. And of course the chocolates or things you want to fill the bags with.


Write the numbers from 1 to 24 on the paper bags and decorate the white ones.


Make sure to fold the paper around the twine and then staple it around the twine with a stapler:


Ready!


If you like it more colourful, then you can of course also use different paper bags with different colours and different patterns.

Hope you will enjoy your Advent calendar as much as I do.

Kram,

Isabell


Friday, November 23, 2012

Advent wreath or Advent candle holder?

It's time to think about having an Advent wreath or candle holder this year. They are already selling a lot of different styles at the shops, some basic versions where you just get the wreath or the wreath with red or white candles. Or the complete version with candles and decoration. I will go for an Advent wreath and a candle holder this year, usually I have either a wreath or a candle holder.

These are the decorations I have as an inspiration:

Photo: tickytacky-marielle


Photo: solebich.de/deko-pipapur

Photo: styleroom/ullisan


Photo:styleroom.se/wilmis

I want to keep it as simple as possible this year, maybe I just choose a wreath that is made of different materials:


Photo: dawanda

I'll show you as soon as it is ready!

Kram,

Isabell


Tuesday, November 13, 2012

Twinkle, twinkle, little star - DIY star garland

This is a garland from a magazine that is easy to do. You just need different wrapping papers you like, some cotton balls and a yarn.

Photo: livingathome
Start with the stars and cut them out twice (one for the frontside and one for the backside) Here is a picture which you can use as a model, print it out in the size you prefer.
Photo: haus.de
Take the stars and stick them together, but put the yarn between the two stars at different heights. Thread the yarn into the needle and put the needle through the center of the cotton balls. Now you can place the garland wherever you like e.g. at the window or on a gift.

Kram,

Isabell